Search
RSS

Blog

DIY Garden Planter Template

With spring rolling in around the corner, there are many things to get in order to prepare for Spring gardening. For those of you out there who are a little more free spirited with your gardening, in the sense that the flowers will “grow where they grow,” this DIY probably won’t hold much interest for you. But for those of you with the obsessive-compulsive, perfectionist’s personalities in the garden stay tuned.

Here is a great way to get all your little seedlings lined up and in order like a well-trained platoon of soldiers. 

What you will need:

  1.        1- foot by 1-foot pieces of plywood
  2.        Tape Measure or ruler
  3.        Pencil and Permanent Marker
  4.        30 small objects to make holes in the soil (wine corks, wooden spools)
  5.        Wood Glue
  6.        4 cabinet handles
  7.        Sandpaper
  8.        Wood stain (if desired)


Steps:

1. Sand out any rough edges on our 1-foot by 1-foot boards

2. Using your ruler measure out in the cneter of the boards, a grid of 9 equal squares (see image) 

3. Take your small bojects using the wood glue, and attah them at al intersections of your gride. Let dry. (see image) 

4. Once your pieces are dry, flip the board and attach your cabinet handle using wood glue, in the center of the board

5. Finish with wood stain if desired. 

Once spring comes, and it’s time to plant, you can be sure that this DIY Planter Template will have you planting even rows of beautiful flowers, fruits and vegetables.


Happy Gardening Everyone! 

All Things Pumpkin

All Things Pumpkin


Tis’ the season to make everything pumpkin! Everywhere you turn there is something with pumpkin in it, lattes, candles, facial cream. Everything. But, how can you bring back pumpkin to its original place, the garden.

Here are 3 fun ways to keep pumpkin in the garden this fall.


  1.        Pumpkin Planter

Pumpkin planters are an adorable way to plant seasonal flowers and keep them fed, through their natural nutrients. Here is how to create your own pumpkin planter;

What you will need:

  •          Large pumpkin
  •          Carving tools
  •          Any plant you desire
  •          Water


To make your pumpkin planter, hollow out the center of your pumpkin in proportion to the liner around your plant.

Cut out a small opening at the bottom of your pumpkin to let out any loose water. (This will help keep the pumpkin from rotting early.)

Last, simply place your plant in the hollow pumpkin and water.

How easy was that!


  1.        Classic Jack-O-Lantern

There is nothing that screams fall more than Jack-O-Lanterns.

Since most already know how to create a Jack-O-Lantern, we thought it might be fun just to share some brief history about what made them such a popular fall tradition.

Originally, Jack-O-Lanterns were an old Celtic tradition, but they were not created with pumpkins. In ancient Ireland they did not have pumpkins and would use Turnips instead. The Irish brought the tradition of carving vegetables and placing an ember in them to scare evil spirits to the Americas in the 1840s. The carving evolved into pumpkins over time and remained a Halloween tradition!


  1.        Composting Pumpkins

After all the pumpkin projects, and buckets of gooey guts, what is a gardener to do with all this remaining pumpkin? Compost of course!

Composting a pumpkin is easy. Take any leftover Jack-O-Lanterns, or extra pumpkins bought at the store and place them in the desired spots around your garden. (Be sure that all pumpkins are cleaned out of seeds and other materials.)

Have a smashing party! Crush those pumpkins into mushy little pieces. This is a great time to invite the kids or grandchildren out to the garden!

Lay a thin layer of leaves over the top of the pumpkin.

Let the Sun and nature do its work!


While pumpkin lattes are tasty, and pumpkin candles smell wonderful, it’s good to get pumpkins back to where they come from. With so many nutrients and variations of decoration they provide for the garden, why take them out of there in the first place? Enjoy these pumpkin projects and have a wonderful fall!


Happy Gardening!


Getting the Garden Ready for Fall

Getting the Garden Ready for Fall


There are many ways to prepare your garden bed for fall, but what are some of the most important?

Here are some tips for getting the garden bed ready for the fall season.


  1.        Plant your spring bulbs. For the best results plant them by October.
  2.        Get rid of any diseased foliage. This helps plants go dormant for the winter. Plants will come back fuller and healthier next season.
  3.        RACK UP THOSE LEAVES! Leaves are a wonderful compost for the garden. Composted leaves provide a multitude of nutrients to the soil. Quick tip: Do not add walnut tree leaves to the compost, they contain a chemical harmful to plants when the leaves break down.
  4.        Prepare your trees for the weather. Fall and winter can produce some frigid weather and strong wind in some parts of the world. Prepare your trees to stand up to the weather.
  5.        Last, and certainly the most fun, fill up the feeders! This is migrating season for all birds. Especially if you live in southern regions, fill those babies up! Birds get quite hungry from the days of travel to prepare for the winter season.


These are just a few tips to get you ready for fall. With the beautiful weather, fall is a great time to get out and garden. Bring your garden up strong in the spring with early preparation!


Happy Gardening! 

DIY Fairy Garden

Are you looking for something new to do with the kids or grandkids?

Want to get them outdoors and away from the technology?      

Here is an adorable craft to decorate the garden with the kids help!


What you will need:

  1.        Large Flower pot
  2.        Soil
  3.        Your choice of plants/ flowers
  4.        Twigs of several sizes
  5.        Plastic Cup or Bottle
  6.        Decorative Rocks
  7.        Hot glue gun
  8.        Twine


Step 1: Take your twigs and create some fairy furniture! 

Step 2: Take your plastic cup or bottle and glue your decorative rocks on to create a fairy home.

Step 4: Set your decorations and home aside and fill your flower pot with soil. (You want it to be as full as possible without overflowing.) Add your plants. (For our fairy garden that we are keeping indoors we chose to use fake moss and plastic flowers.)

Step 5: Add your fairy decorations to the flower pot! 

Enjoy this fun project!

Happy Gardening!


Images curtesy of Pinterest. 

4th of July Garden Craft's

The 4th of July is approaching fast!

Are you looking for a creative way

to celebrate the birth of the United States of America?

Below you will fing a few creative DIY garden crafts

that you can create to help you celebrate.

#1

You can creat this patriotic piect with a pallet, spray paint and star stencils.

#2

This can be done with an old jar, sand, three colors, candel and our flag.

#4

These pariotic beauties can be created with white melting chocolate and blue food coloring.

#5

This cute craft is created using 3 old vegtable cans, star stencils and paint.

(Read the back of the paint to see if its good for painting metal.)

6#

This refreshing snack is made with

Shish Kabob sticks, strawberries, blueberries and pinapple.


 Happy 4th of July!

DIY Natural Miracle Grow

Give your garden that extra boost with your All-Natural Miracle Grow. 

If you are looking for a more natural way to fertalize your plants

look no further. It is simple and easy. 

You will need:

1. 1 gallon of water

2. 1 tbsp Epsom Salt

3. 1 tsp Baking Soda

4. 1 tsp House hold Ammonia

5. 1-2 tsp blue food coloring (this help others realise it is not water)

Once you have added all of the above into a garden container its ready to mix and use as needed.

Feed your plants about once a month. You can spray or pour it onto your plants.

Baking Soda In The Garden

Dear garden friends,

Baking Soda is our friend in the garden as well as in the kitchen. Baking Soda can be used in the garden for many different reasons. If you want to keep the pest away from your plants, rejuvenate your roes bush, sweeten your tomatoes, and more. Next time you are making your grocery list add another box of Baking Soda for your garden. 

Baking Soda

How to keep the pest away:

If you are having a problem with pest you can sprinkel Baking Soda around the garden. Don't sprinkle it directly on your plants. This will help discourage rabbits, roaches, silverfish ants and more.


How to rejuvinate your roses:

1 tsp. Baking Soda

1/2 tsp. clear ammonia

1 tsp. Epsom Salt

1 gallon water

(This mixture will treat about 4 rose bushes that need a pick me up.)

Spray


How to make sweeter tomatos:

Sprinkel Baking Soda near your established plants to make a sweeter tomato.

Tomato

Check out Mister Landscaper Pintrest page for more great DIY garden ideas.


Happy Planting!


Composting

Is your garden looking like it ran out of fuel? Composting may be your solution. When you add composting to your garden it can restore your soil and give it that nutrience needed to help your garden thrive!


What about the smell?

Some people worry that having a compost pile means you have to deal with the smell of rotting food. There is an easy solution to this initial worry. By adding a layer of dirt to the top of your compost it will help reduce any odor. 

How do I make a compost pile?

You can make your own compost pile or you can buy one. I have seen them for as cheap as $20.00 on Amazon. It just depends on the size you want and how much you want to spend.


What can I add to my compost pile?

  1. fruit and vegtables
  2. coffee ground
  3. natural tea bag
  4. loose leaf tea
  5. coconut milk
  6. napkins
  7. pizza box (will need to rip up)
  8. papper bag
  9. tomato sauce
  10. cereal box
  11. nut shells
  12. seaweed
  13. burnt popcorn
  14. old oatmeal
  15. fruit pits
  16. toothpicks
  17. paper cups
  18. lint
  19. bills
  20. sticky notes

Do not compost the following:

  1. cooking oil
  2. diseased plants
  3. human or animal feces
  4. meat
  5. milk
  6. rice

 You can use google to find list of additional items that you can or can not compost.


Conserve Water This Summer

Are you looking for ways to conserve water?

The hot summer months are near.

Warm weather usually is a recipe for more water usage.

People are washing cars, filling pools, watering gardens and more.


Conserving water has been best practice in most regions.


Conserving water can not only reduce pollution in lakes and streems,

it can also save you money on your utility bill.

Below you will find a few ways to help you conserve water.

  1. Put a layer of multch around trees and plants.

    • This slows evaporation of moisture.
  2. Water your garden only when it needs it.

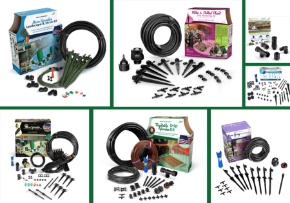
    • Mister Landscaper's DIY Low-Flow Irrigation  for the garden and potted plants can help with this. 
    • Mister Landscaper also sells a timer so you can control when your garden is watered while you are away.
  1. don't run the hose while washing your car.

  2. Water your garden in the morning. 
    • This reduces evaporation and prevents fungus from growing.
  3. Use a broom not a hose to clean the driveway.

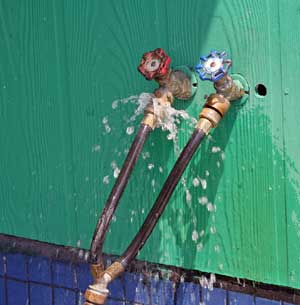
  4. Check for leaks in hoses and pipes.

    • A leaking faucet can loss 20 gallons of water a day.
  5. Use a water meter to check for hidden leaks.

    • Read the meeter two hours before and after water usage.
  6. Put water boosters in the back of your toilet.

    • Use a small bottle with rocks in it to save 10 or more gallons a day. Keep bottle away from operating tools.


Straw Bale Garden

Have you ever wondered if soil is the only way to grow a garden? Believe it or not you have other options. Today I am going to share with you how to create your own Straw Bale Garden.


Straw Bail Garden's are  great for planting in small areas or areas that don't  have soil. You will need to prep your Straw Bale Garden. The good news is that it will only take 12-14 days to prepare.

The great news is that if you use Mister Landscaper's DIY Irrigation you won't have to worry about most of the prep work. The first move is to purchase your straw bales and liquid fertilizer, with nitrogen to to increase the decomposition process. The total process takes 10-12 days. 

Before you set up your Mister Landscaper DIY Irrigation Kit you want to make sure your straw bale is on it's side with the cut side up. The cut side of the straw bale will act like little straws. This allows the water and fertilizer to soak down into the bale.  Now you are ready to set up Mister Landscaper's DIY Low-Flow Irrigation Kit. This only takes about 20 minutes or less. 

If you order  Mister Landscaper's Timer you can attach it to the end of your hose and you won't  have to water your bales for the next 3-4 days. You will want to set the timer to water often so that it remains damp for the entire three days. On the third day you will start using the liquid fertilizer. For the next 7-8 days you will want to use the liquid fertilizer. in addition to watering.

On day 12 you will want to return to just watering your bale. On the 12 day you will be able to stick your hand down into the bale and feel the heat from the decomposing process.

You don't want to plant until that tempature reaches the same temperature as the outside air.

If you plant too soon you will cook your plants. On the TH day you will need to start using the liquid fertilizer. Once the temparture reaches the air temperature it's time to plant.

You can plant anything in your Straw Bale Garden although some plants can pose a challenge. For example, corn and tomatoes grow tall and may cause your bale to tip.

Potatoes grow down and it may be difficult to retrieve them. To plant you will plant the same way you plant in the soil. You want to dig out a hole as deep as your plants root.

Be sure to space your plants according to the directions on the plant. Add some soil around the plant to stabiles it then place the straw you removed from the hole on top of that..


Finally you are ready to sit back and watch your plants grow. Don't forget to fertilize the plants once every week or two. Mister Landscaper's DIY Irrigation will take care of the watering.