


Frequently Asked Questions

Is Mister Landscaper easy to install?
Absolutely, yes! It was designed for homeowners, gardeners, and landscapers of all skill levels. The products are extremely well made, easy to use, and the directions are clear and uncomplicated. The complete Mister Landscaper Starter Kit can be installed in under 30 minutes! Each of our kits and all of our products is designed to be very user-friendly. Can t find the answer to your questions? Simply email us anytime at sales@misterlandscaper.com or call us at 800-654-4086 Monday-Thursday 6:30 a.m. to 4:30 p.m. You are going to love this product!
Can I add Drippers to a Micro Sprinkler Kit?
The short answer is yes, absolutely! But for more detailed information on this and other related topics, please go to: Maximum Runs
Where can I use my Mister Landscaper system?
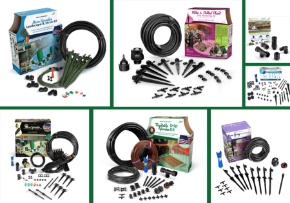
Mister Landscaper has designed several kits to meet specific watering needs and has developed an entire line of products that allow for complete customization of any system. Attach Mister Landscaper directly to an Outdoor faucet, or use one of our retrofit products to tie into an existing PVC system. With Mister Landscaper, watering landscaped areas, flower beds, patio plants, flower boxes, tree rings and vegetable gardens is easier than ever. The only limit is your imagination...
Not for Indoor use.
How many feet of 1/2-in Poly Tubing can I run from one faucet?
With a minimum household water pressure of 40 PSI, you can run up to 300 feet of the Mister Landscaper 1/2-in Poly Tubing from a single outdoor faucet - that s as long as a football field! And from that same line you can connect up to 50 Stake Assemblies for up to a whopping 5,500 square feet of coverage. You will be amazed with how much you can water with this system! (If you would like to find out your current household water pressure, contact your local water company).
How much water can I save using a Mister Landscaper system?
Mister Landscaper is Dedicated to Conserving one of our planet s most Precious, natural resources - Water. Compared to traditional, high-volume irrigation, a Mister Landscaper system can use up to 50% less water or more! Each Stake Assembly is controlled to use only ten gallons per hour. And Drippers only use from one-half to two gallons per hour. Your hand watering will be a thing of the past and saving water, well, it just makes sense!
How much area does each Mister cover?
Mister Landscaper has developed an entire line of Misters designed to help an individual completely customize a system that works for them. And while we do offer a variety of spray patterns, the average diameter is about four to six feet, and you can use the Mister Valve on the Landscape Stake Assembly to adjust the size and distance of your spray pattern up and down.
How can I avoid spraying my house and sidewalk?
There are a variety of Misters available from Mister Landscaper. Some of them are designed for broad, wide-open spaces. Others are specialized for particular applications. When it comes to options, Mister Landscaper has everything from 90° corner patterns and 165° half-circle patterns to center strips ideal for narrow areas. Customizing a system to meet your exact needs is easy with Mister Landscaper.
When is the ideal time to water my plants?
The best time to water your plants is in the morning. This ensures the water is fully absorbed by the soil and roots. Watering in the heat of the midday sun can shock hot plants and burn their leaves. The water is also likely to evaporate rather than be absorbed by the plant (meaning it will have to be watered more often). Watering at night can attract slugs and lead to the onset of diseases (such as mildew and black spot). Make sure you water your plants thoroughly. If you only sprinkle water on the soil s surface, the plants will develop shallow root systems (which will need watering more often). A thorough soak will penetrate the soil s surface and ensure your plant is well nourished. When planning your landscapes and gardens you should consider grouping the thirstiest plants in the same area to make watering them easier.
How long should I be watering my plants?
Depending on if you are using Micro or Drip irrigation, the soil type, climate, season and plant variety play an important part of setting up your watering schedule. A general recommendation is that you water every other day from thirty to sixty minutes. Take note of how your plants are responding to these cycles and adjust them as needed. Example: in very Hot Climates, you may want to water every day. In Cooler Climates, every four to seven days. Using Mister Landscaper drip and micro-spray irrigation can also help prevent plant damage from "over" watering.
What tools will I need to install Mister Landscaper products?
Beyond your hands, you won t need much at all! In fact, scissors are the only not-included tool required. You ll use them to cut the 1/2-in Poly Tubing and 1/4-in Vinyl Tubing. If you are connecting Mister Landscaper to an existing PVC system, there may be other tools required to deal with the PVC.
Precipitation Rates PDF
Can I bury the 1/2-in Poly Tubing under ground or mulch?
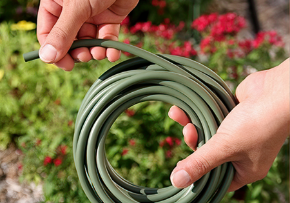
Absolutely! All Mister Landscaper products, including the 1/2-in Poly Tubing, are made with the highest quality materials and resins. Our Poly Tubing will last for years whether on top of the ground, exposed to the elements, covered with mulch, or buried underground. When burying the tubing, we suggest using a lawn edger to make the job easier. Drip tubing cannot be buried.
How do I run the 1/2-in Poly Tubing under a sidewalk?
To install the 1/2-in Poly Tubing under a sidewalk, there are several different methods available. The simplest and least expensive is to use a garden hose with the water running at full pressure to remove the dirt from under the walkway. Another available method is to drive a length of PVC under the sidewalk. You can then slide the Poly Tubing through the pipe. Additionally, boring kits can be purchased at some home centers and hardware retailers.
Can I make the Stake Assemblies taller?
Not a problem! Mister Landscaper makes a Stake Extension (the MLS-22) for this very purpose. When added to the Stake Assembly, the overall height is increased to more than 18 inches.
Can I move the Stake Assemblies further from the Poly Tubing?
Yes, you can. Use the green, black or tan Mister Landscaper 1/4-in Vinyl Tubing to add up to 30 feet of length between a Stake Assembly and the 1/2-in Poly Tubing. This allows for an incredible amount of flexibility when setting up a system.
How do I connect the 1/4-in Vinyl Tubing to the 1/2-in Poly Tubing?
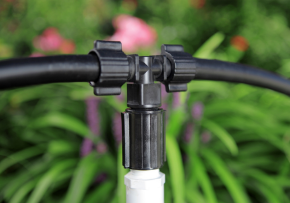
You simply push the end of the 1/4-in Vinyl Tubing onto one side of the 1/4-in Barbed Couplers. If you have arthritis and weakened hand strength, no problem. Just dip the end of the Vinyl Tubing into a cup of very warm water until the Vinyl Tubing is warm. This will make the installation even easier). Or if you can use the Installation Tool (MLA-TOOL), it can be used as leverage to push the Vinyl Tubing onto the Coupler. Next use the Installation Tool (MLA-TOOL) or the Punch Tool (MLA-51) to punch a hole in the side of the 1/2-in Poly tubing. Take the 1/4-in Barbed outlet of the Coupler and push it into the punched hole. It is simply a snap to install!
Can I connect a Mister Landscaper system to an existing PVC system?
Yes! You have several options available and a list of our products are under "Retrofit to PVC", then scroll down to see our products.
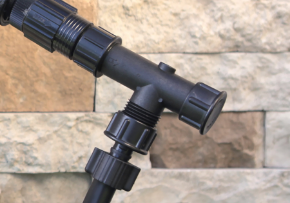
One way is to use one of our Fittings - MLA-P2P to connect the 1/2-in male threads to your existing PVC and then connect 1/2-in Poly Tubing to the locking collar side of this fitting and run the Poly Tubing through your landscapes - attaching either our Micro Stake Assemblies or Drippers.
Or use our MLA-P2HTE to connect the 1/2-in male threads to your existing PVC and then attaching one for our Pressure Regulators - MLA-58 for Micro Sprinklers or MLD-25PR for Drippers - then using our 1/2-in Poly Faucet Fitting MLF-33 to attach to the Pressure Regulator and then connect and run the 1/2-in Poly Tubing along your landscapes and gardens.
The other options would be to remove the sprinklers spray heads from their PVC riser and replace with one of our PVC adapters that you can attach either Micro Sprinkler Stake Assemblies and/or Drippers.
Can I connect a Mister Landscaper system to a Rain Barrel?
You can use our products with rain water in a gravity Tank or Rain Barrel but there are limited ways it will work due to low pressure. Using a rain barrel, we found which of our drippers and micro sprays will work on a gravity feed. It seems that only the Adjustable Dripper (MLD-ADB) will work out of all of our drippers, (because it does not have a flow control device inside which takes a certain amount of water pressure to activate and open).
Out of the Micro Sprays, the (MLM-03B). What we have found to work best is to layout up to 50-ft of our 1/2-in Poly tubing and punch a hole using our punch tool and thread in our micro spray. It will not give you a spray pattern but will drip water. Depending how much water is in the barrel and size of barrel, you will get different flows. When it is full you will get more pressure and more flow. The higher your tank is off the ground, the higher the pressure.
Due to limited water pressure from Rain Barrel systems, our Automatic Timer (MLWT-TIMER) will not work with this type of system. The Automatic Timer needs a minimum water pressure of 20PSI in order for the valve to open and the maximum water pressure is 80 PSI.
Due to algae and other debris in the collected water we also suggest a screen filter (MLFF-41).
How many Drippers can I install?
Which of the following best describes your installation?
Drippers with a beginning water pressure of 25 PSI using 1/4-in Vinyl Tubing as the Main Line.
How can I Winterize my Mister Landscaper system?
Learn how to winterize your Mister Landscaper System
We recommend winterizing your system. Winterizing your system helps prevent damaging the components during freezing weather. Before the first freeze, start by shutting off your water faucet or the mainline that supplies water to your irrigation system. Remove batteries if using a timer, then store the timer indoors. Next, uncrimp the end fitting and allow the water to flow out, then replace the end cap. This will help to keep out any dirt or insects. If you are using a filter then this is a good time to clean the screen. It is not necessary to blow out your system, but in the event you do, we recommend that the pressure not exceed 30 PSI.
Can I bury my Drip Tubing?
Unfortunately, No. Dirt and roots of plants will clog the drippers.
How often should I check my system?
It is recommened every 1-2 weeks. Like with any other irrigation system, you will want to inspect it on a regular basis. Lawn equipment, heavy traffic areas and animals can wreak havoc on your irrigation system!
How do I stop Squirrels from chewing my tubing?
Most likely, the animal could be looking for water. During drought conditions, this can be a problem. Setting out a small tin or bucket of water for them to drink usually solves this issue.
Why won t my Mister spray?
Occasionally, during installation, the Mister and/or Violet Flow Controller may become clogged with debris. Use a small paper clip or needle, to unclog the Mister s orifice. To clean the Violet Flow Controller simply twist the two halves apart and clean it (be careful not to lose the diaphragm), and then rejoin the two halves. You may also experience clogging if you have hard or dirty water. In this case, the cleaning procedures are the same. However, to prevent future clogging, use the Mister Landscaper screen filter (MLFF-41).
If you are not using a pressure regulator, then your water pressure could be to high and has damaged the blue disc (diaphragm) inside the Violet Flow Controller. For this, just remove the disc and close the Flow Controller and use without the disc.
If your water pressure is too high, we recommend you install either a 25 PSI Pressure Regulator (Drippers) (MLD-25PR) or a 50 PSI Pressure Regulator (Micro Sprays) (MLA-58).
Why is the Backflow Prevention Valve leaking?
The Backflow Prevention Valve was designed with relief holes to reduce pressure and prevent water from flowing back into the pipes once the water is shut off. When the water supply is turned off at a faucet, negative pressure or a vacuum is formed. Without the Backflow Prevention Valve installed, water can be suctioned back into your pipes. With the Backflow Prevention Valve, when this water is pulled, it is allowed to flow out the relief holes and not back into your home. This is completely normal and nothing to worry about.
Another cause for a leaking Backflow Prevention Valve is incorrect placement. If the valve is mistakenly placed before a timer, and the system is not active, water will leak from the relief holes. Because a faucet must be left open for a timer to work, too much pressure is placed on the valve. If a timer is used, it must always be installed first. This is then followed by the Backflow Valve. Inspect regulary for leaks.
Why is my Pressure Regulator leaking?
Both the 25 and 50 PSI Pressure Regulators are designed with a single air vent in the side of the casing. This air vent allows a diaphragm inside the regulator to move back and forth. Typically, the only time water would leak from this hole is if the regulator has been installed in the wrong order. If a regulator is installed before the timer, the pressure build-up can be too great when the system is not running and can cause the air vents to leak. If a timer is used, it must always be installed first. This is then followed by the Pressure Regulator. On rare occasion, dirt or debris might get caught up in the diaphragm. To clean it, simply remove the pressure regulator and backwash using a hose. Inspect system regularly.
Why doesn t my Pressure Regulator reduce pressure?
The Pressure Regulators are designed to reduce pressure ONLY when the system is running. So if, by chance, you test the Regulator with a pressure gauge and get a reading higher than expected, it s because water is not being allowed to flow continually through the regulator. If a gauge is placed directly after the Pressure Regulator, the flow of water stops at the gauge, the Regulator s diaphragm opens and the pressure is equalized on both sides of the device. Thus, giving a reading consistent with the home s normal water pressure.
The pressure Regulators are designed for a flow of .5 to 8 GPM. They are not designed for a static situation (no flow). Do not use these regulators inside a house or anywhere a leak might damage something. The plumbing codes state; do not put a regulator or backflow device in line with constant pressure. Use these devices only after the on and off valves. You can only check pressure of the regulator while flow is running thru the regulator to the system. Check psi of the regulator somewhere down stream of the regulator in the irrigation system while the system is flowing water.
You can test the system pressure by attaching a pressure gauge anywhere in the hose or pipe of the system and not at the regulator itself. Or you can attach a hose “Y” to the pressure regulator and attach the gauge to one side and your system to the other.
Why are my Drippers Blowing Out?
When drippers are used with a 25 PSI Pressure Regulator (MLD-25PR) — as they always should be and they are installed correctly, you should never have an issue with blowouts. Generally, when blowouts are experienced, it s because the drippers have been installed backwards (Drippers should always be installed into the tubing with the pointed barded end into the tubing).
Follow this link to view a PDF instructional on How to Install Drippers in 1/2-in Poly Tubing and using 1/4-in Vinyl Tubing.
Why are the tops of my Adjustable Drippers and Dripper Stakes are blowing off?
The main feature of Adjustable Drippers and Dripper Stakes is that their flow rates are easily adjusted from a 1 GPH drip up to a 10 GPH small 8-stream spray. Adjusting the flow up and down only requires a simple turn of the top. However, if the top is over-rotated, the water pressure can become too great and result in the top blowing off. The simple solution to this is to be aware of how much you ve rotated the top. Follow this link to view an instructional PDF on how to accurately set GPH output on your Adjustable Drippers and Dripper Stakes. But if by chance you ve already lost a top or two-no worries! We ve got replacements here.
What goes on the faucet first?
My Timer won t turn off, what should I do?
The valves are held together magnetically. During transit, the vibration could cause the valves to remain "open".
Follow this procedure with your water ON.
Turn the Program-OFF
Scroll to Manual and turn it-ON arrow to your right (wait to hear a click or the number 5 will stop flashing)
Arrow back to Manual-OFF (wait to hear a click or see the word OFF stop flashing)
Scroll back up to Turn the Program back ON
This should turn the water off, and it will start again to your normal programmed time.
For Technical Support: email misterlandscaper@melnor.com or call 1-877-283-0697 Ext. 129
How many Dripper Stakes can I run off of 1/4-in Vinyl Tubing?
Due to limited water flow through 1/4-in Vinyl Tubing, no more than one kit (8 Dripper Stakes) can be installed on a faucet
Due to limited water flow through 1/4-in Vinyl Tubing, no more than Three (3) Dripper Stakes in a daisy-chained group will deliver full 10 GPH output. All other installed stakes will function at less than 10 GPH, even if they are turned on completely
To run up to four kits (32 Dripper Stakes) from a single outdoor faucet, 1/2-in Poly Tubing must first be installed as the main line.
Why do I hear a humming noise in my pipes?
This is a common question. Usually the main cause is too much water pressure coming into your house. You would need to put a pressure reducer at your main water line coming into your house. Another possible cause is air trapped in your water pipes. You can google:
Should I perform a "Spring Start Up" of my system?
Spring Micro Irrigation System Start Up Steps for Micro Irrigation:
To get your system up and running after the winter season, simply bring your Timer back outdoors and re-attach the Timer to the faucet. We recommend checking your batteries or installing new batteries in your Timer to make sure your Timer functions properly. Check your Timer program to make sure it is set to the correct time and days that you wish to water. Then simply re-attach your fittings underneath the Timer (Backflow device, Pressure Regulator, Faucet Filter and Hose Fitting.) Remove the Winterizing Plug (if used) from your poly and attach the Poly tubing onto the Hose Fitting. Remove the End Cap or End Crimper from the end of your ½” Poly tubing or in-line dripper tubing and turn your water on and flush the system out. This will help to remove any debris that might have entered the tubing during winter. Next, re-install your End Cap. Then check your Micro Sprays or Drippers to make sure they are emitting water properly. You can unthread any of the micro sprays to clean them if there is any debris blocking the water output by using our All In One Tool with an easy to remove cleaning tool. It is as easy as that! Now you are all set for the upcoming spring/summer season!
When the Timer (MLWT-1ZONE or MLWT-TWOZONE) is "set", does it "count" the day on which it is "set" or does it skip that day?
If you program the timer Prior to the Start Time you are setting, then the timer will run the cycle scheduled at that "Start Time" and then the next cycle will run the next day, second day, third day or one week from now.
Example:
Current Date: Friday
Current Time: 11:00 AM
Start Time: 2:00 PM
Water For: 5 Minutes
Water Every: 3 Days
Timer will start the next cycle on Friday at 2:00 PM, water for 5 minutes and then will not water again until Monday at 2:00 PM.
IF the timer is programmed After the Start Water Time then the timer will run the next cycle the following day at the Start Time and then will run the "Water Every" that you programmed next day, Second Day, Third Day or one week from that first cycle.
Example:
Current Date: Friday
Current Time: 4:00 PM
Start Time: 2:00 PM
Water For: 5 Minutes
Water Every: 3 Days
Timer will start the Next Cycle on Saturday at 2:00 PM, water for 5 minutes and then will not water again until Tuesday at 2:00 PM.
For Technical Support: email misterlandscaper@melnor.com or call 877-283-0697 EXT. 129
Can I lead-off with my garden hose?
How much area will the dripper cover?
Depending on the soil type, watering time and gallonage of the dripper, you will typically see a 6-in to 12-in pattern. With the Adjustable Dripper Stake (MLD-STA) you will see up to a 3-ft pattern.